- Step 1. Create HTML5 Module
- Step 2. UAA Service
- Enable UAA for XSJS
- Step 3. Route and Destinations
- Step 4. Consume the OData service
- Step 5. Run on Cloud Foundry
- Step 6. Deploy
- Step 7. Undeploy DB Artifacts
- Step 8. Commit Code
- Next Steps
本系列文章我们将介绍如何在 SAP Cloud Foundry Platform 上进行 HANA XSA 模式的程序开发。 上一篇 SAP Cloud Foundry XSA - Getting Started 我们创建了一个 MTA 项目,并成功创建和访问了 HANA Database 的数据,这一篇我们介绍介绍如何在 MTA 项目中开发 SAPUI5 前端和使用 UAA 服务做权限管理。本篇的项目代码可下载自 gitlab.com/i.tiven.wang/sap-cf-xsa-demo .
环境:
- SAP Cloud Platform Trial
- Cloud Foundry Trial
- Neo Trial
SAP Help:
Step 1. Create HTML5 Module
on Project -> New -> HTML5 Module 选择模板类型为 SAPUI5 Application
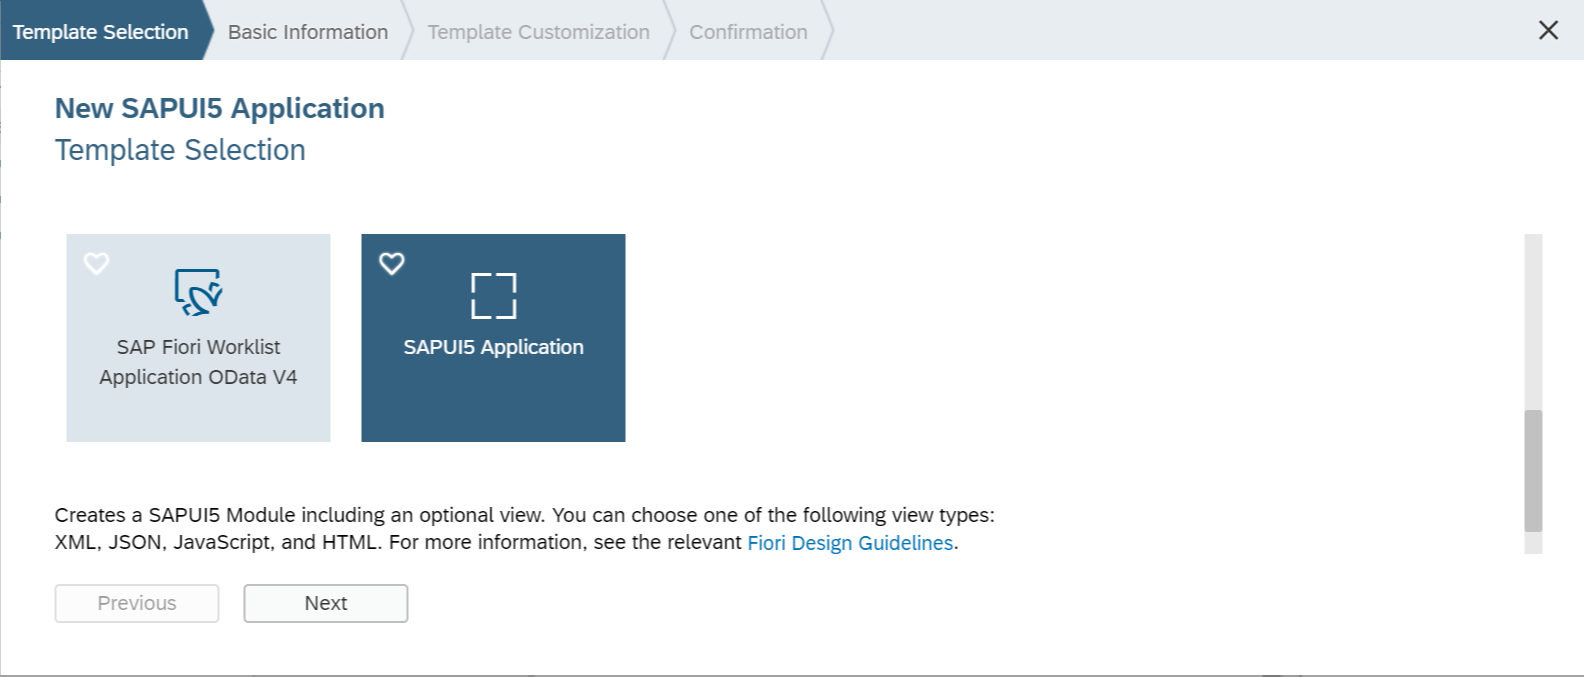
命名为 web ,完成后可以测试一下, on web -> Run -> Run as Web Application -> index.html 可以打开一个只有 Title 的 UI5 页面便证明成功了。
Step 2. UAA Service
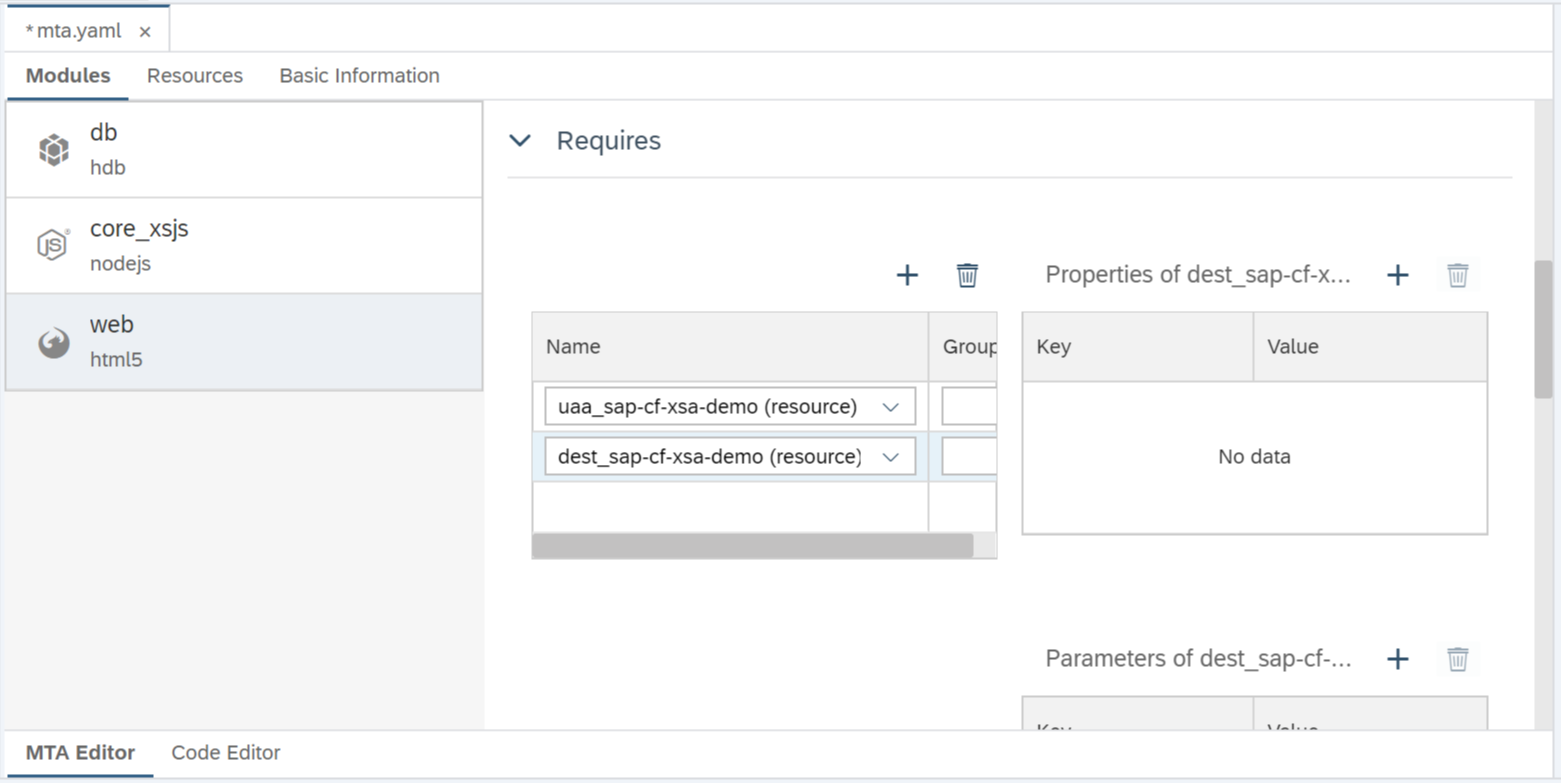
在生成 mta 配置文件里的 web app 的 Requires 属性里可以看到两个资源一个 uaa 另一个 destination 都已经配置。
Create Service Manually
如果有的情况下没有自动创建的资源则可以手工创建,如在 SAP Cloud Foundry Platform -> Services -> Authorization & Trust Management -> Instances 里创建一个 UAA 服务实例,Plan 选择 application . 或者使用 CF CLI 进行创建。
$ cf create-service xsuaa application UAA-service
Creating service instance UAA-service in org P2001285375trial_trial / space dev as i.tiven.wang@gmail.com...
OK
Before you can establish a dependency between your HTML5 module and the UAA service instance you created in the previous step, you need to list the UAA service instance as a resource in your applications. For example:
resources:
  - name: uaa_sap-cf-xsa-demo
    parameters:
      path: ./xs-security.json
      service-plan: application
      service: xsuaa
    type: org.cloudfoundry.managed-service
Enable UAA for XSJS
前端 web 自动创建了 uaa 服务进行了权限限制,那么我们用此 uaa 服务再对后端的 core_xsjs 服务进行权限控制,为 core xsjs 配置如下
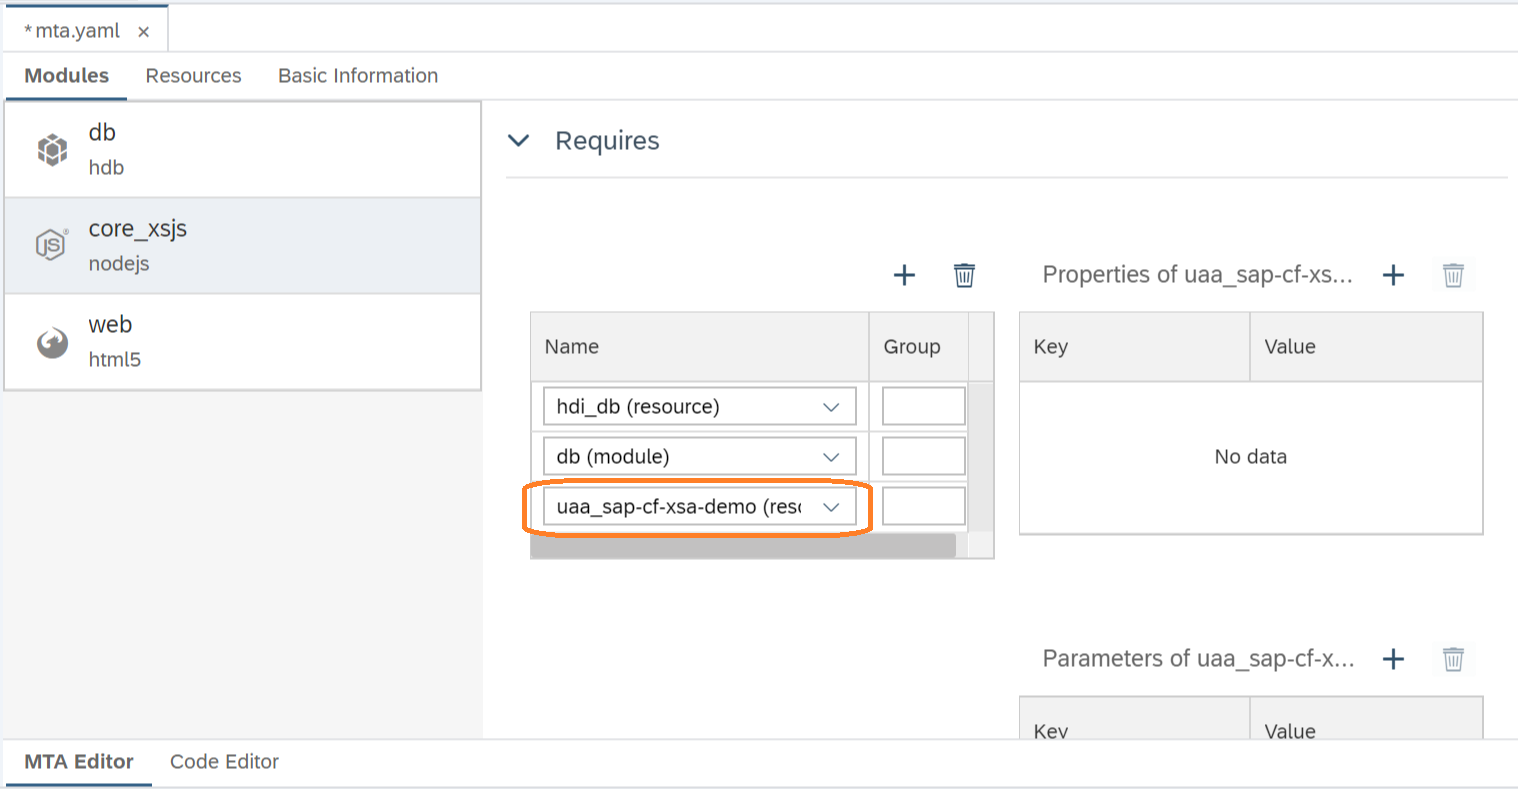
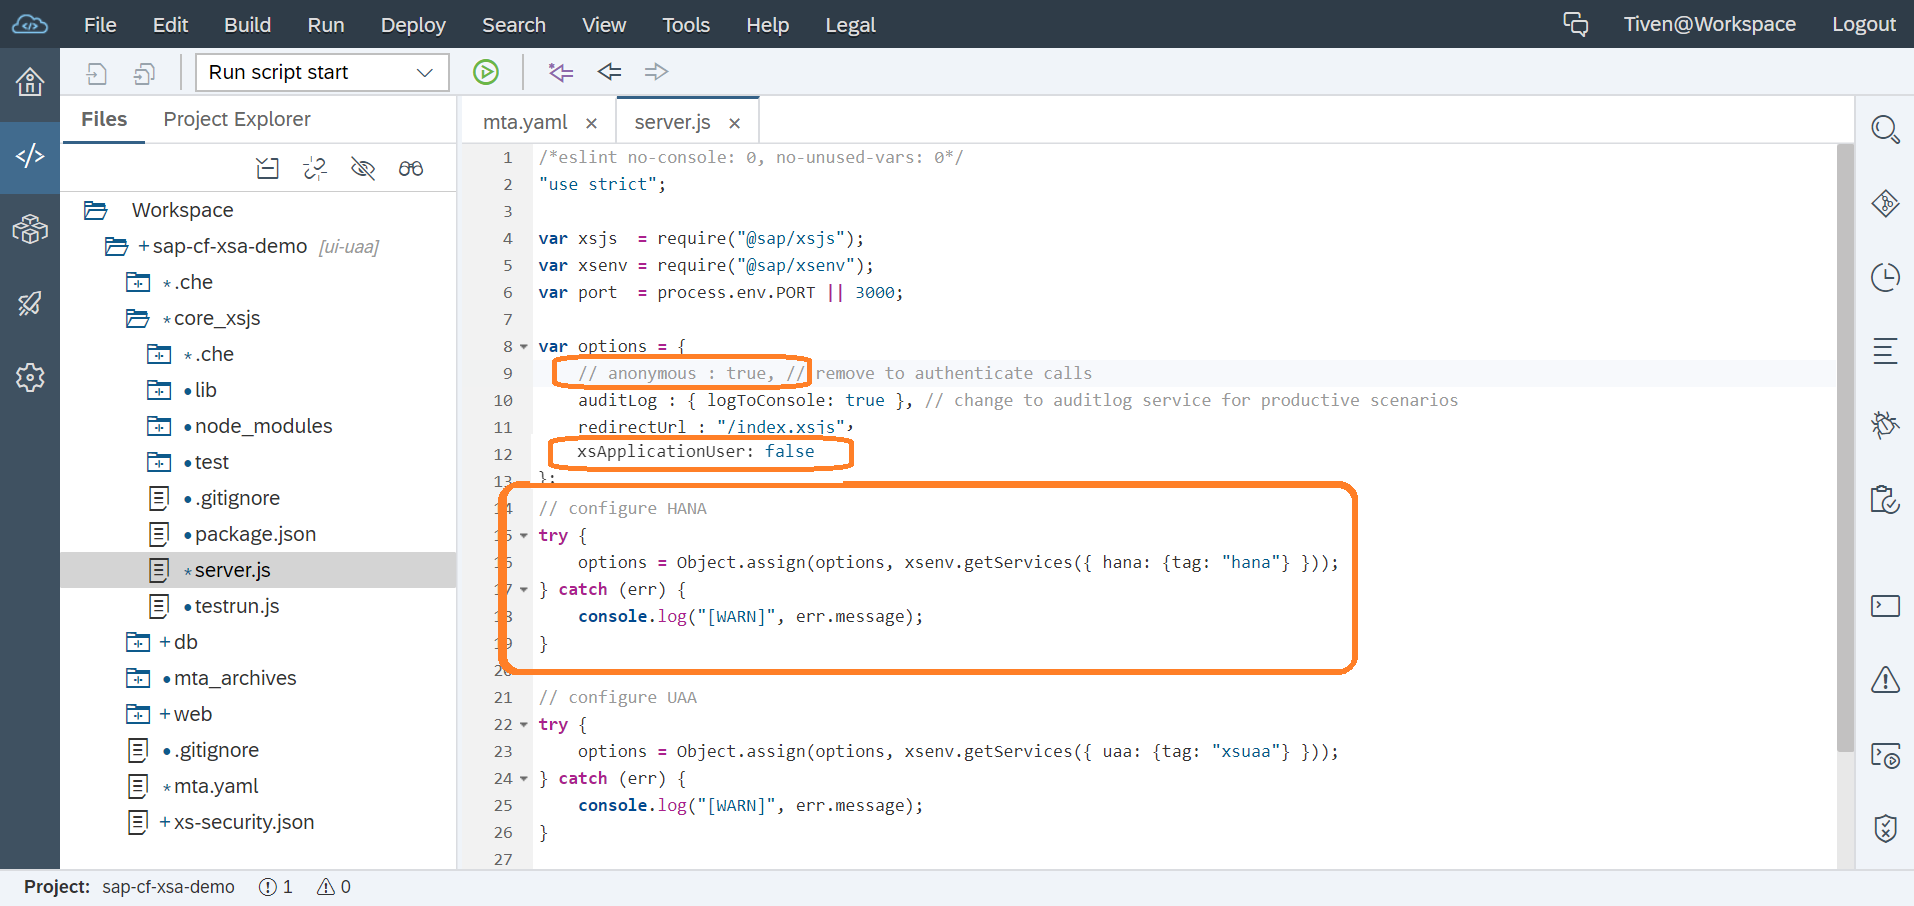
然后还要在 xsjs 程序主入口文件 server.js 里的 xsjs 配置选项中把 anonymous : true 注释掉,就会使用能找到的 xsuaa 服务对权限进行控制。并增加配置 xsApplicationUser: false 防止 Application Session User 设置给 XS User 带给 HANA DB
Step 3. Route and Destinations
要使前端 App (web) 访问后端 App (core_xsjs) 我们还得为前端 App 配置依赖和 Router,对后端的依赖配置如下图
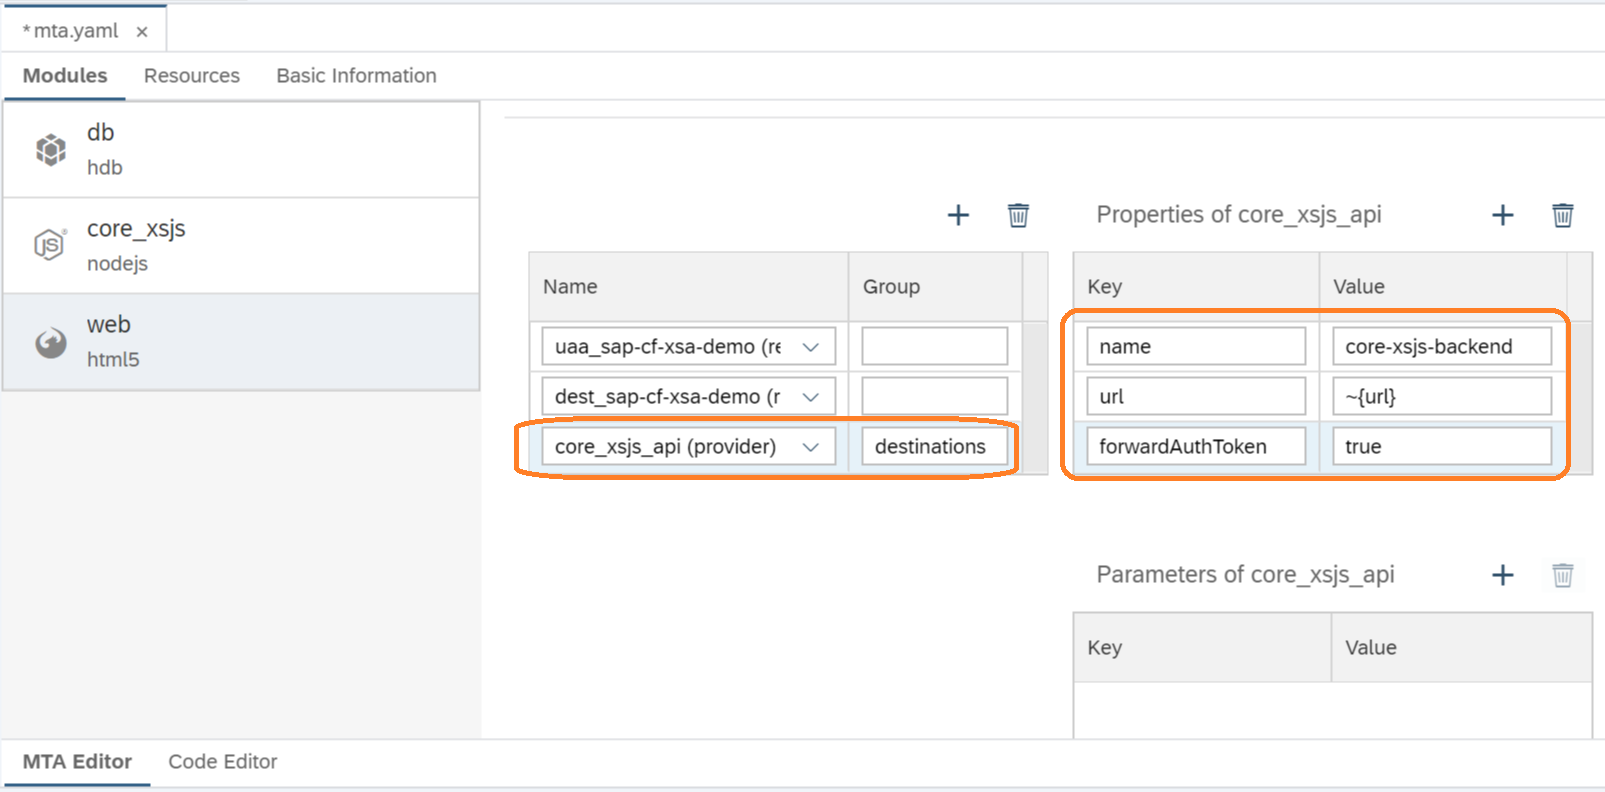
然后还要在 web/xs-app.json 中增加路由配置如下
{
  "welcomeFile": "/web/index.html",
  "authenticationMethod": "route",
  "logout": {
    "logoutEndpoint": "/do/logout"
  },
  "routes": [
    {
      "source": "^/web/(.*)$",
      "target": "$1",
      "localDir": "webapp"
    },
    {
      "source": "(.*)(.xsodata)",
      "destination": "core-xsjs-backend",
      "authenticationType": "xsuaa"
    },
    {
      "source": "(.*)(.xsjs)",
      "destination": "core-xsjs-backend",
      "authenticationType": "xsuaa"
    }
  ]
}
Step 4. Consume the OData service
以上配好之后就可以编写代码对后端的 APIs 进行访问了
onInit: function () {
  var oModel = new sap.ui.model.odata.ODataModel("/xsodata/purchaseOrder.xsodata", true);
  this.getView().setModel(oModel);
}
<Table id="idProductsTable" inset="false" items="{
    path: '/POHeader',
    sorter: {
      path: 'PURCHASEORDERID'
    }
  }">
Step 5. Run on Cloud Foundry
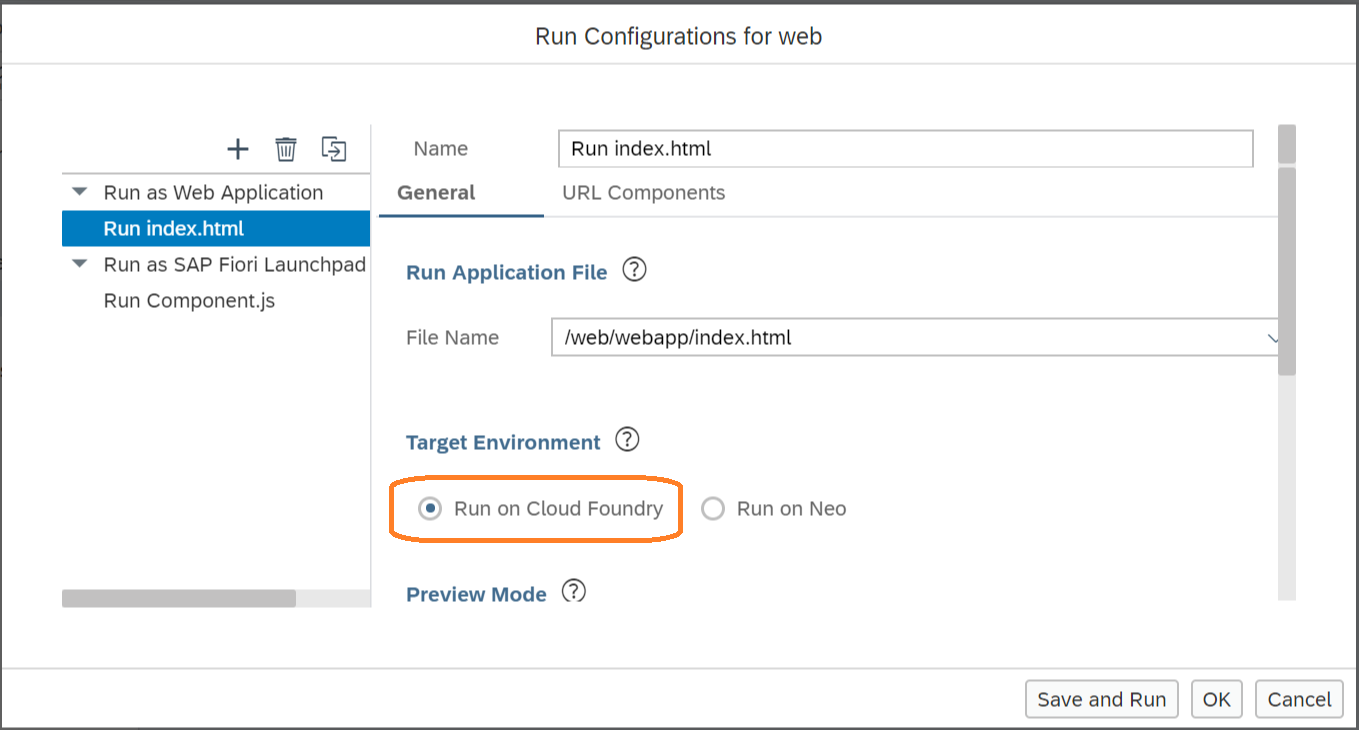
UI5 App 默认是 Run on Neo 环境的,可以在 Run Configurations 里改成 Run on Cloud Foundry,此则会部署到 SAP Cloud Foundry 真实环境进行运行
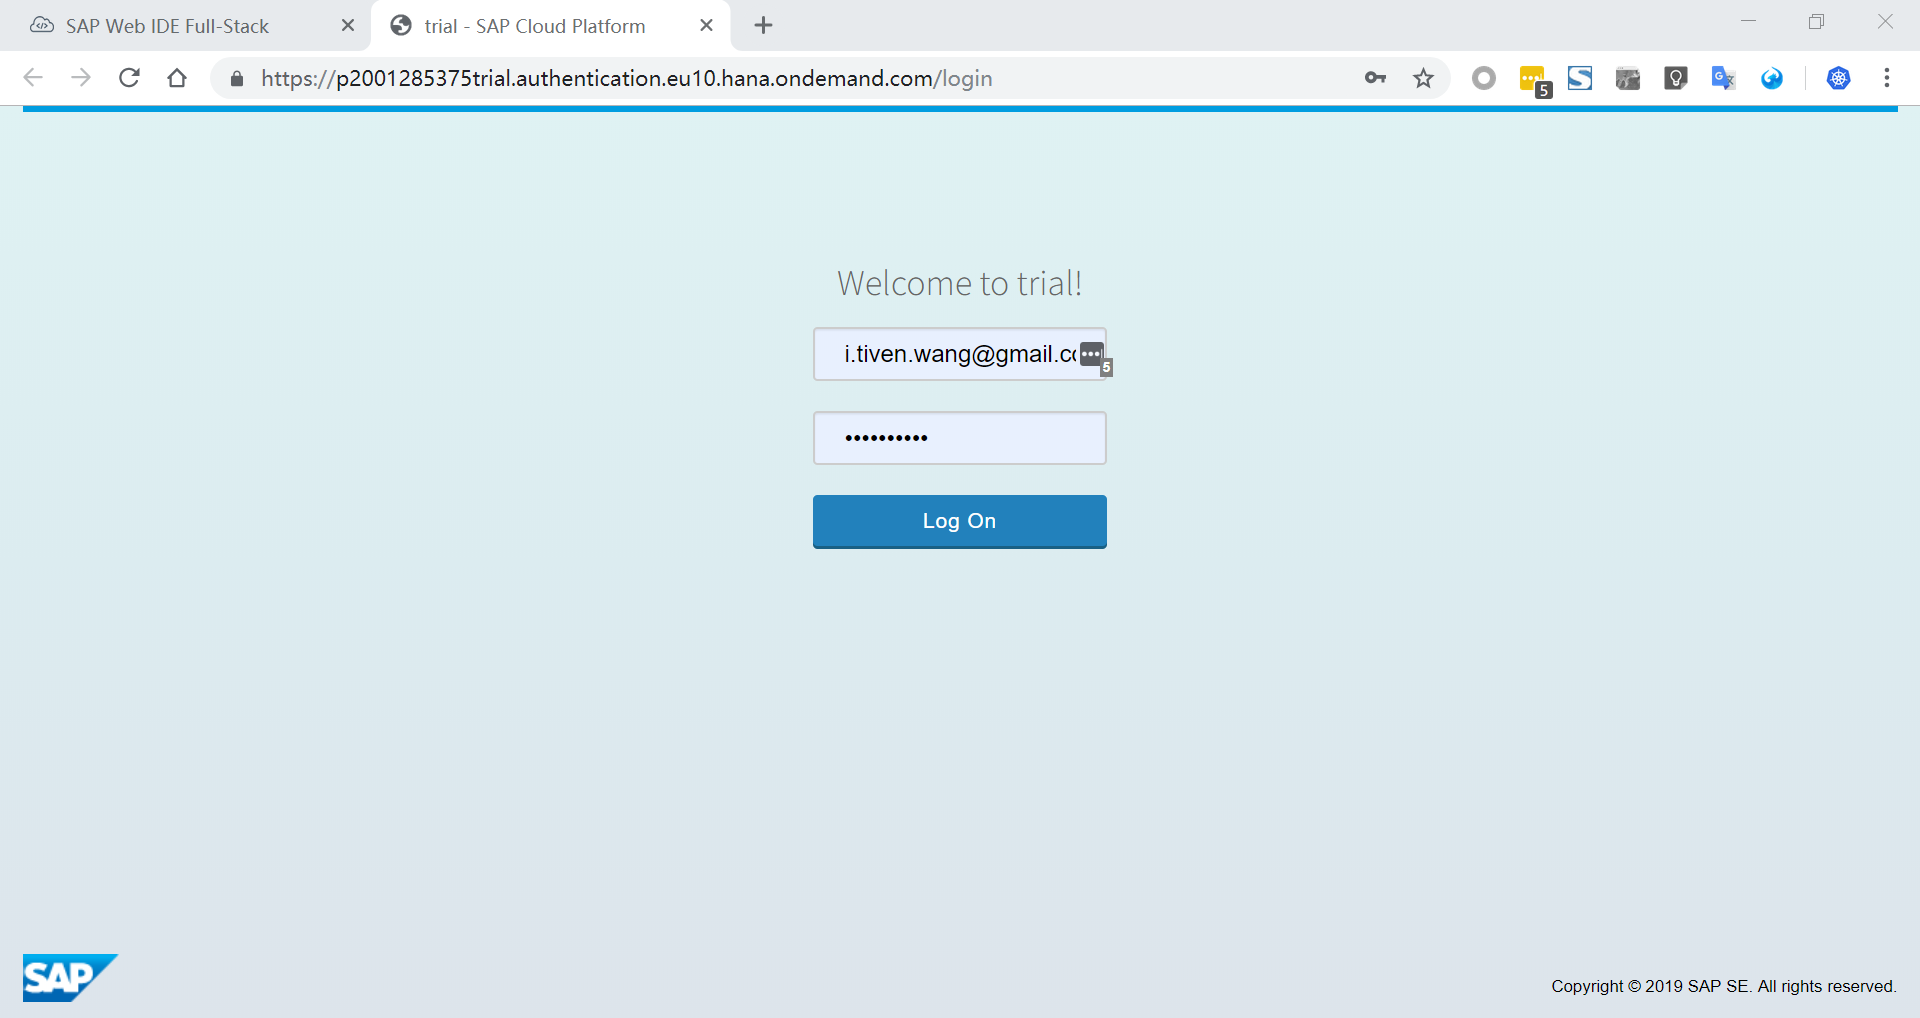
打开链接后由于 uaa 服务的作用,页面会跳到授权页面进行登录验证
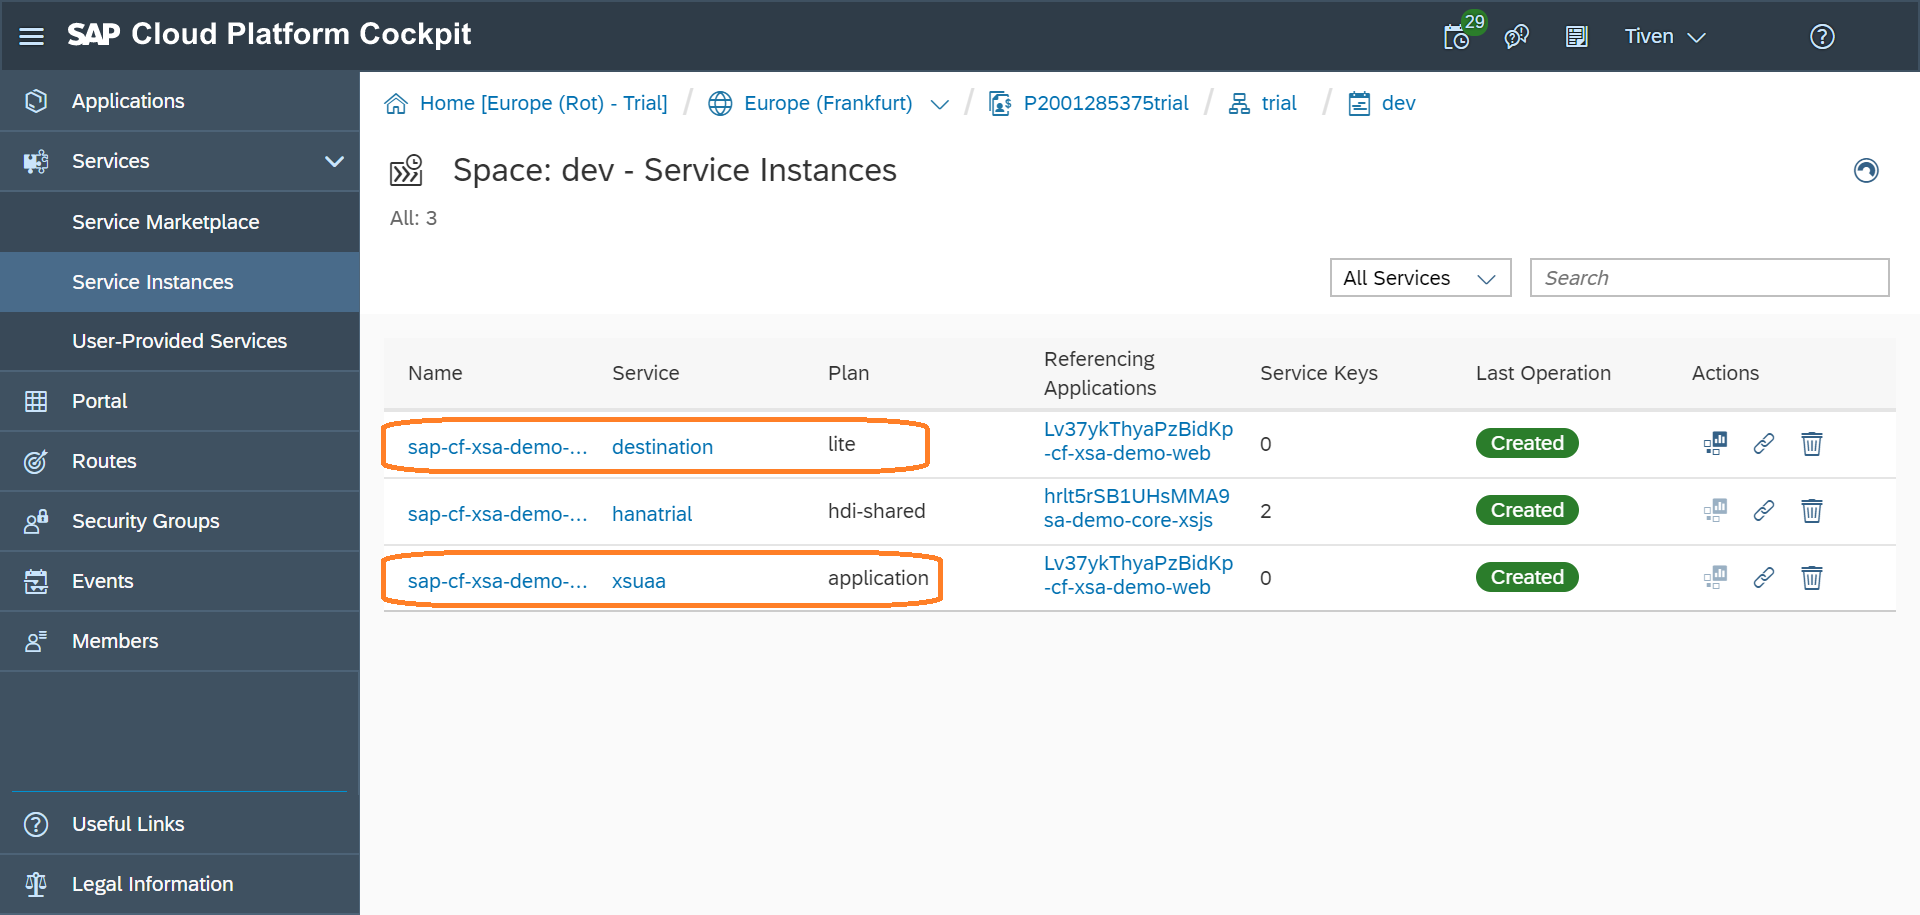
并且在 SAP Cloud Foundry 平台可以看到两个服务实例已经被创建
别忘记 core_xsjs App 有更改,要重新 Build ,即重新部署到 SAP Cloud Foundry Platform
Step 6. Deploy
在这之前都是执行的测试过程,要真正部署到 Productive 环境则需要单独的 Deploy 动作。
-
on Project -> Build -> Build
-
on The mtar file -> Deploy -> Deploy to SAP Cloud Platform 自动选择 Cloud Foundry space 进行部署
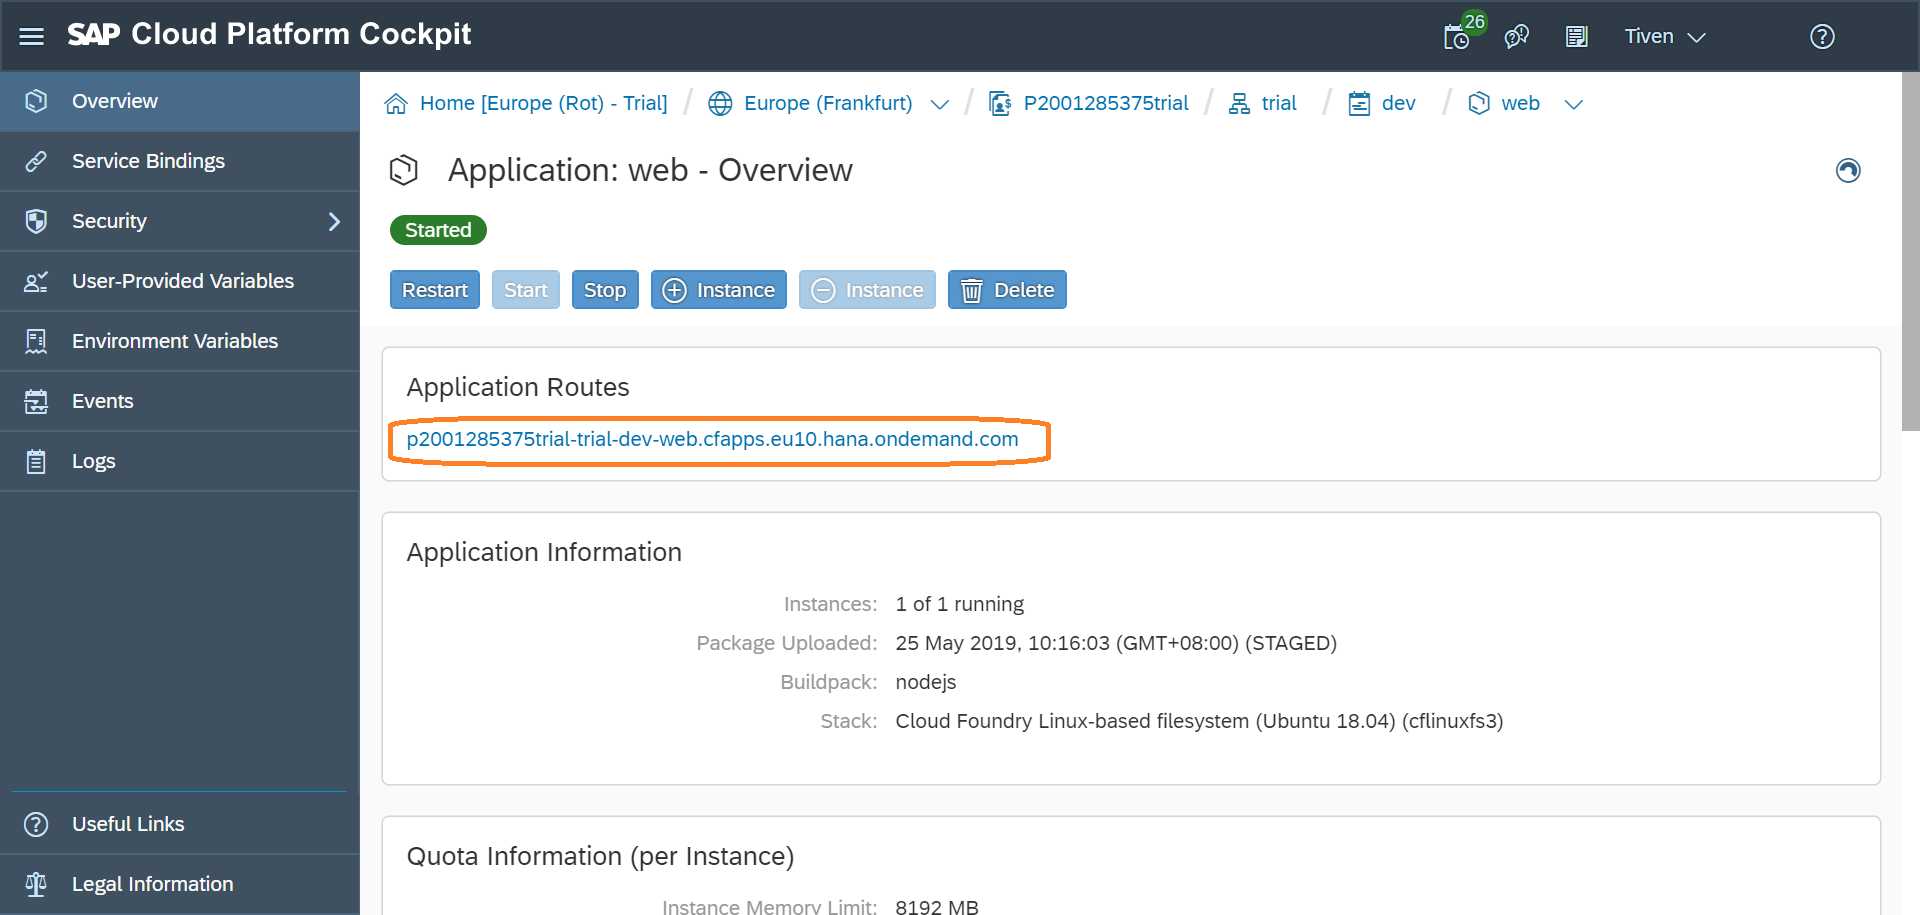
成功后就可以在 SAP Cloud Platform Cockpit 里看到部署的应用们了,每个应用里都可以看到自己的对应的链接
Deploy Errors
我遇到的错误,Deploy 时出错:because of: The container “DB” already exists
######com.sap.cloud.lm.sl.cf.persistence.services.ProcessLogger########flowable-async-job-executor-thread-8###
[CreateServiceStep] Last operation for service "hdi_db": {
  "type": "CREATE",
  "description": "Failed to create HDI container on database \u00274e7659f0-cbae-4064-afb7-12f9d2b21ec8:trialdb01\u0027 (10.253.93.93:30041), because of: Call to HANA DI failed, requestId 740038, because of: Creating the container \"DB\"... failed (8214129), because of: Could not create the container \"DB\" (8211042), because of: Could not create the DTC \"DB\" (8211011), because of: The container \"DB\" already exists (8211040), because of: Database error 301: : unique constraint violated: Table(CONTAINERS_) (8201003)",
  "state": "FAILED"
}#
因为本来的配置是这样的, hdi-container 配置了 Schema 参数(因为之前创建 HDI 时的 Schema Name 有填写)
resources:
  - name: hdi_db
    parameters:
      config:
        schema: DB
    properties:
      hdi-container-name: '${service-name}'
    type: com.sap.xs.hdi-container
所以在 New HANA Database Module 章节里的 Namespace 和 Schema Name 字段都要清空,不需要填写(现已改正)。现配置如下
resources:
  - name: hdi_db
    properties:
      hdi-container-name: '${service-name}'
    type: com.sap.xs.hdi-container
再次 Deploy 就成功了。
Step 7. Undeploy DB Artifacts
在开发过程中很可能需要更改或者删除数据库对象,那么对于新增和修改操作,XSA 会自动计算代码和数据库之间的差异并进行同步。但对于删除操作 XSA 不会自动进行删除数据库对象,需要手动设置一个 Whitelist 说明需要删除的数据库对象。
在 db 下创建一个文件 undeploy.json 里面列举不需要的文件(并且要把文件删掉),如下
[
  "src/data/PurchaseOrder.hdbcds"
]
这样重新 Build 后数据库对象就会被删除。
Step 8. Commit Code
最后别忘了提交代码,养成良好的习惯。
Comments