- Step 1. Demo Data
- Step 2. Create a calculation view
- Step 3. Join Products and Business Partners
- Step 4. Join Addresses
- Step 5. Join Product Name with texts
- Step 6. Join Product Description
- Step 7. Finalize the projection
- Step 8. Commit Code
- Next Steps
This tutorial will guide you through the process of downloading sample data and database artifacts and importing it into SAP Cloud Foundry HANA HDI Container using SAP Web IDE for Cloud. Then create a graphical calculation view with a dimension data type.
Step 1. Demo Data
Step 1.1. Download the Data archive
Download data archive zip from GitHub repository
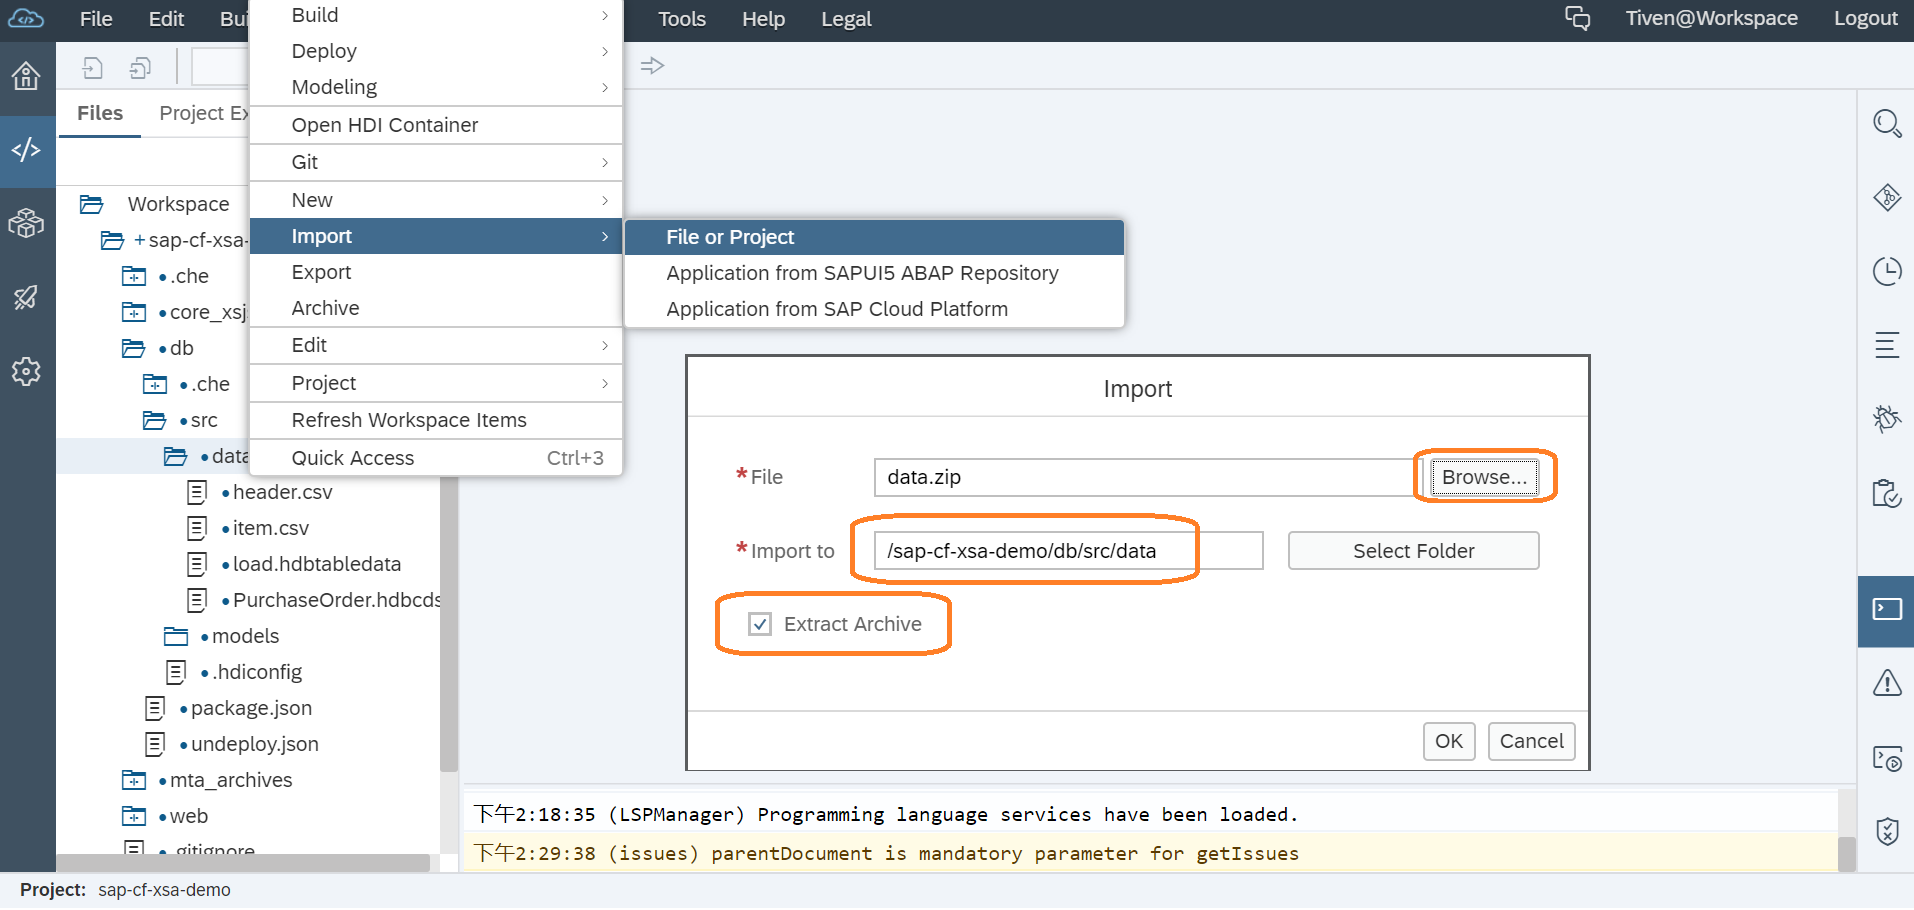
Step 1.2. Import Archive
on db/src/data -> Import -> File or Project -> Select data file -> Ok to import
Step 1.3. Build
因为我们之前使用了相同名称的表并且导入数据,所以会与现在的冲突,先要删这几个文件:
- FLIGHT.hdbcds
- header.csv
- item.csv
- load.hdbtabledata
然后
on db -> Build -> Build
Step 1.4. Check in the Database Explorer
可以在 SAP Web IDE 的 Database Explorer 插件里查看导入的表和数据。
如果想要导入整个 Shine 程序玩玩的话,可以参考 SAP HANA XS Advanced - Clone and run SHINE applications
Step 2. Create a calculation view
创建文件夹 db/src/models, 并在里面新建一个 Calculation View 名称为 PRODUCTS,Namespace 留空就行,选择 Data Category 为 DIMENSION,Type 为 STANDARD

Step 3. Join Products and Business Partners
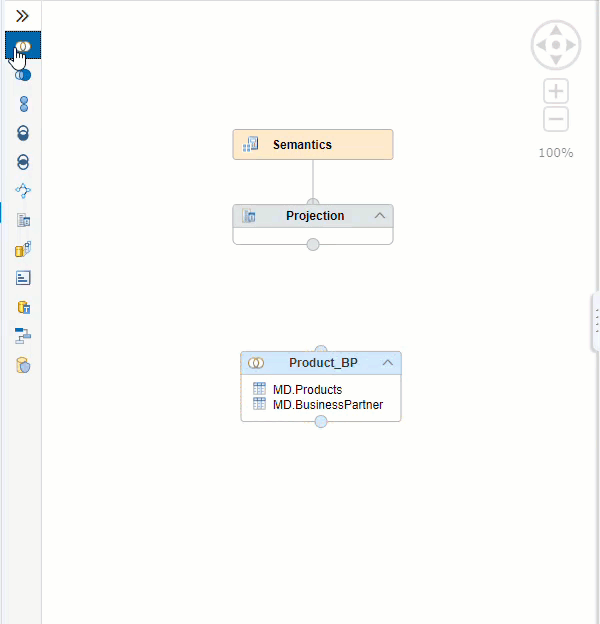
我们新建了一个 Calculation View , 但它目前还是空的,我们给它增加两个关联的实体 Products 和 Business Partners 。点击 Create Join 图标拖动到视图中,
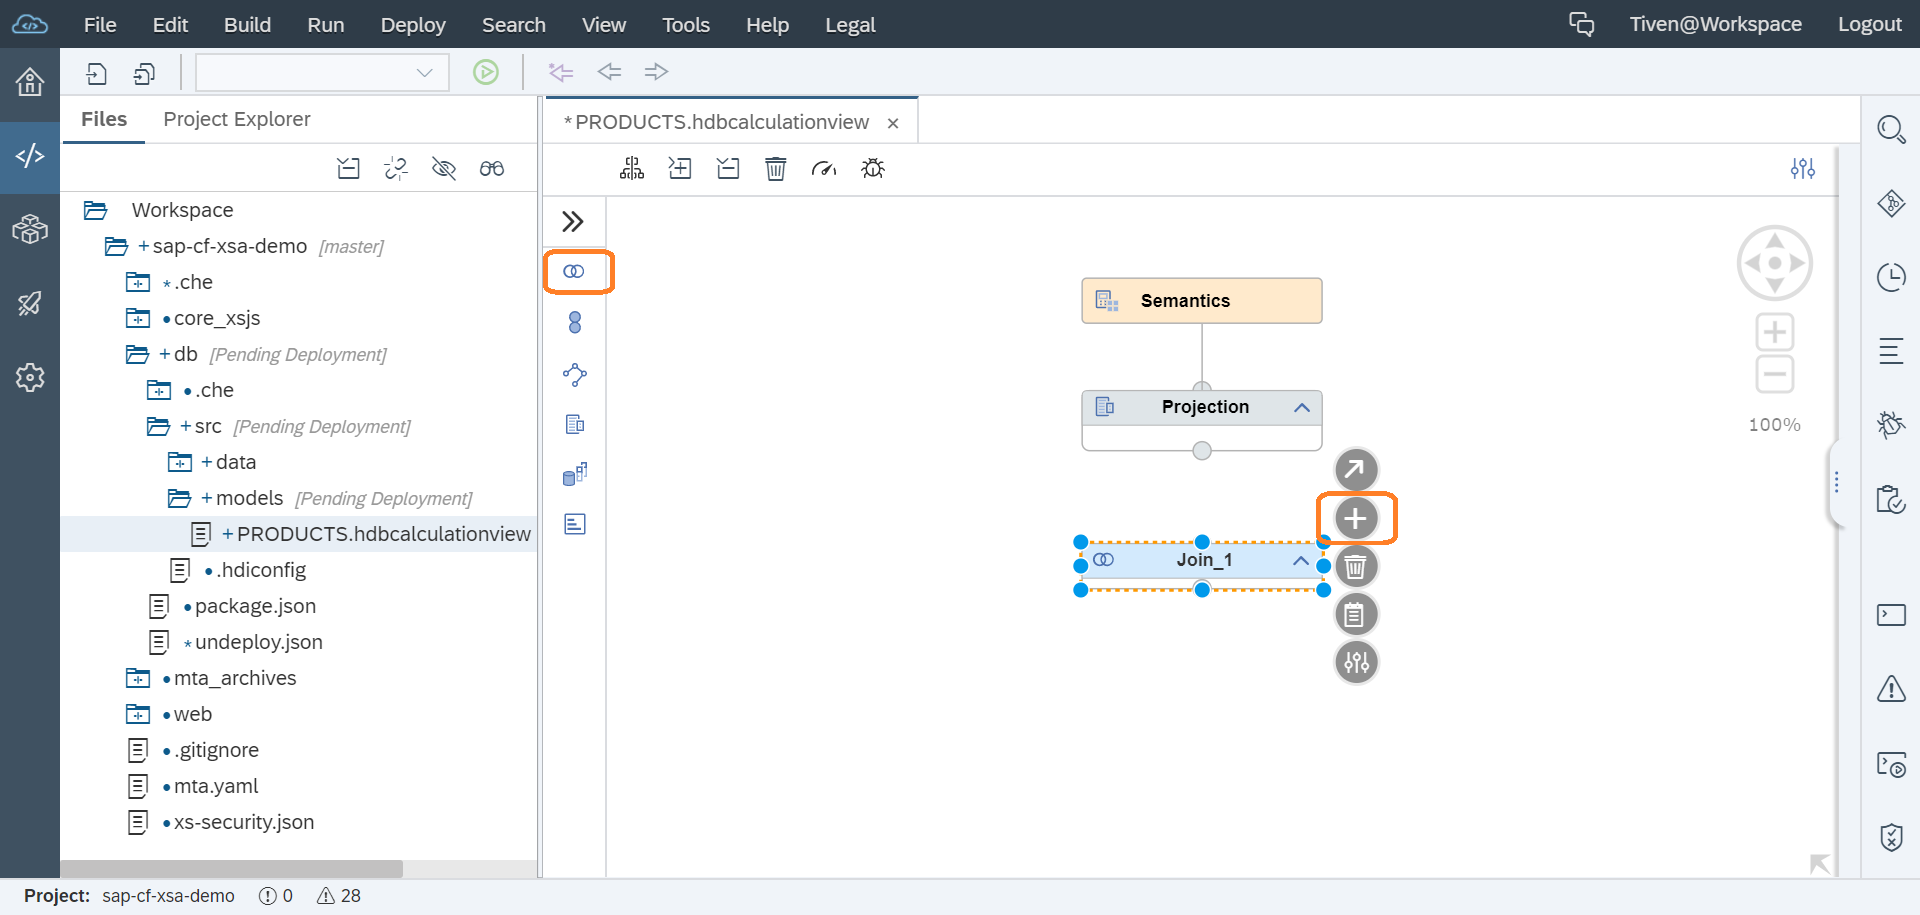
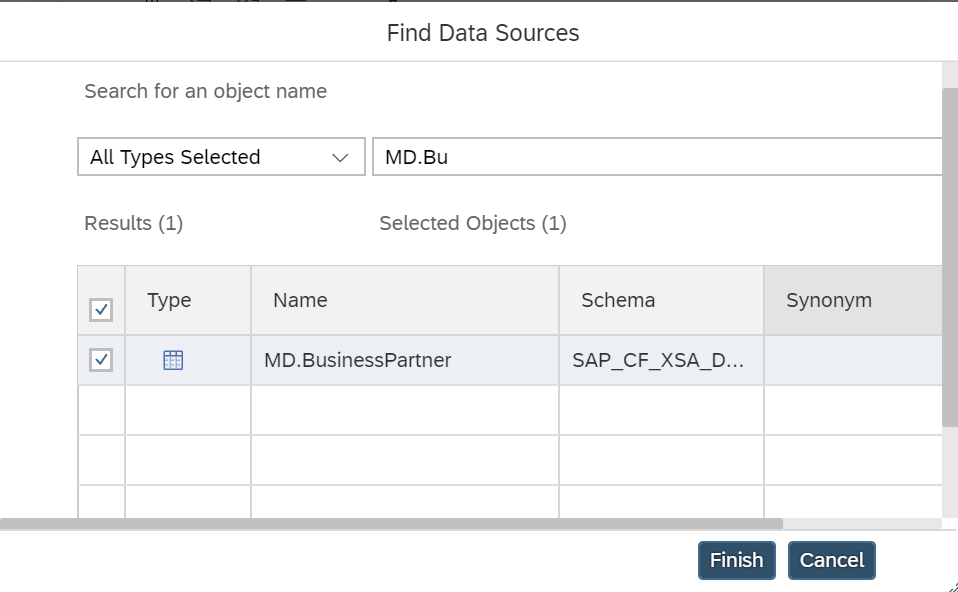
重命名此 Join 为 Product_BP,然后点击 + 图标为 Join Node 添加数据源,分别搜索并添加 MD.Products 和 MD.BusinessPartner 两个数据源
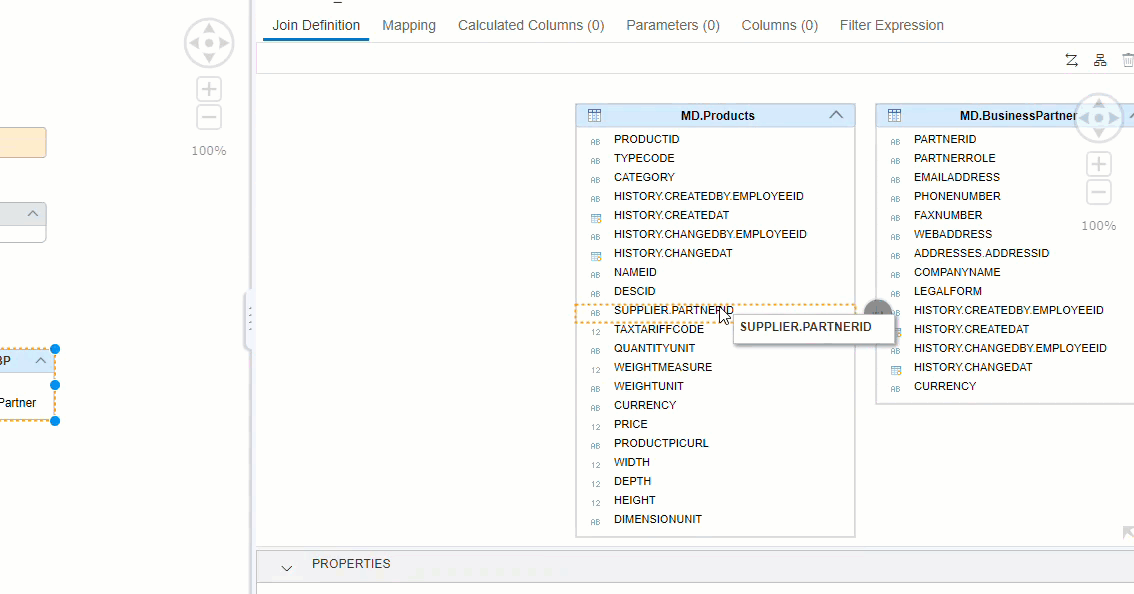
双击 Join Node 的名称打开详细定义,拖动以连接 SUPPLIER.PARTNERID to PARTNERID
打开 Mapping 页,选择左边的这些字段 PRODUCTID, TYPECODE, CATEGORY, NAMEID, CURRENCY, PRICE, DESCID, PARTNERID, COMPANYNAME, ADDRESES.ADDRESSID 然后点击 Add To Output 添加到输出列表
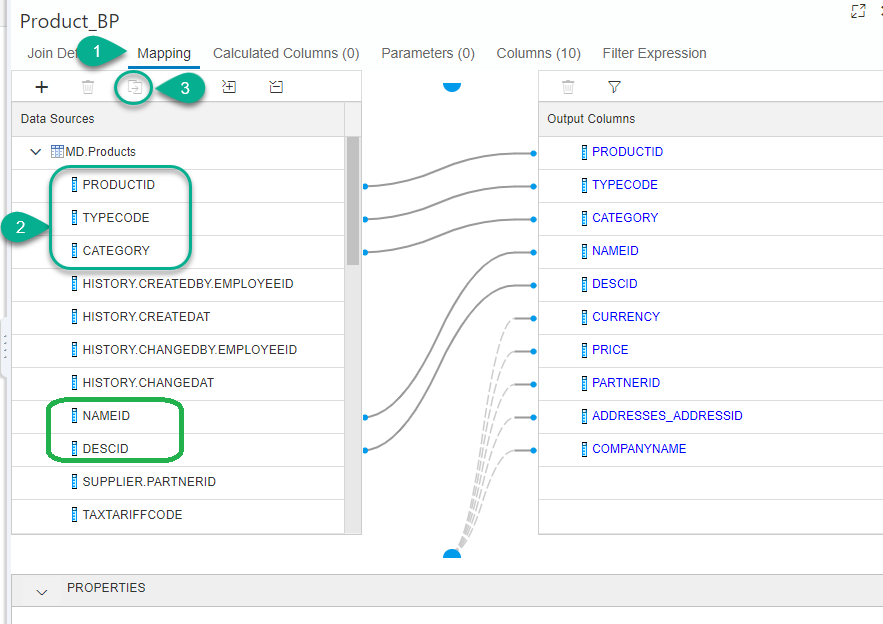
把列名 Category 改成 ProductCategory,这样一个基本的 Calculation View 就做好了。但是我们还没有把此 Join Node 往上加到 Projection 里?因为我们还有其他的 Join 需要添加。
Step 4. Join Addresses
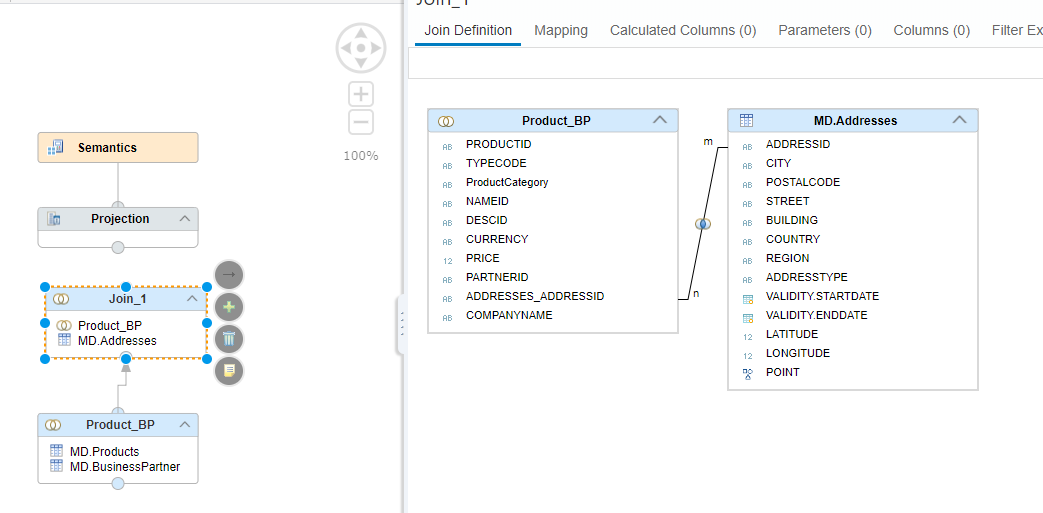
如法炮制,再创建一个 Join 节点,把 Product_BP 节点输入给它
然后再给它添加数据源 MD.Addresses,再用 ADDRESSES_ADDRESSID 和 ADDRESSID 字段把他们 Join 起来
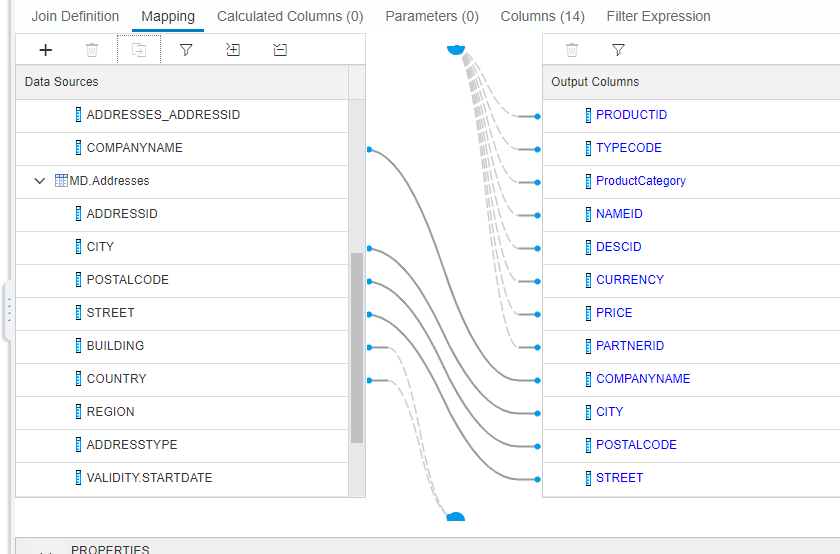
然后再在 Mapping 页 Select all columns from the Product_BP node except ADDRESSES_ADDRESSID. From MD.Addresses table select CITY, POSTALCODE, STREET, BUILDING, COUNTRY and REGION add to Output.
You can double-click on Product_BP to add all of the columns to the output and then right-click on ADDRESSES_ADDRESSID to remove that output column
Rename the current join node to Address.
Step 5. Join Product Name with texts
再来一个 Join , 这次是 Util.Texts 用 NAMEID to TEXTID 连接,但这个连接属性需要设置 Join Type 为 Text Join, Language Column 设为 LANGUAGE
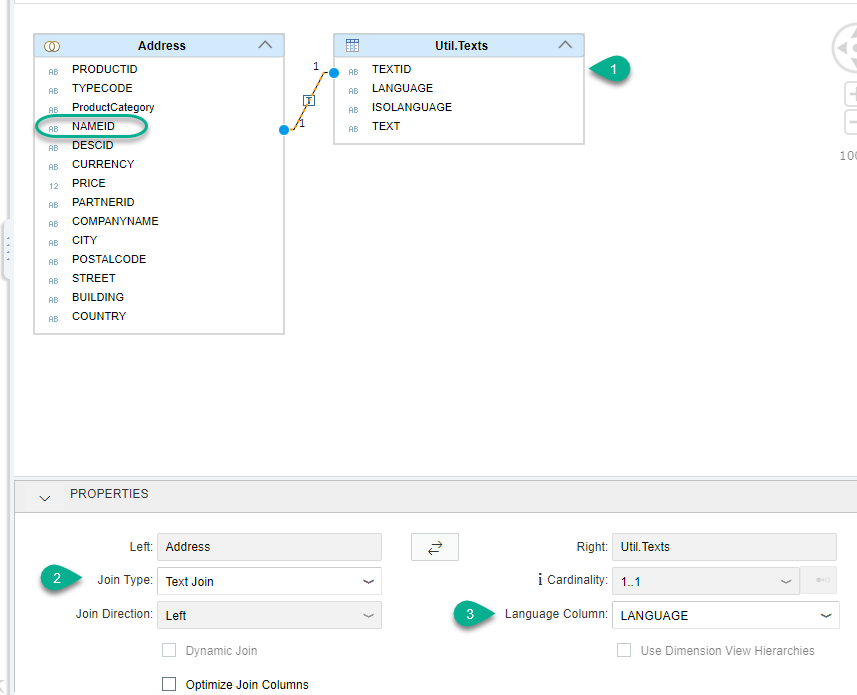
然后再 Mapping 页除了上一个 Node 的列(除了 NAMEID)都加到输出外,再把 Util.Texts 的 TEXT 列加到输出列表并改为 ProductName,此 Node 重命名也改为 ProductName(但这并没有关系)
Step 6. Join Product Description
重复 Step 5 一样的过程再为 DESCID 加上文本字段命名为 ProductDesc (依然是用 Util.Texts),节点命名为 ProductDesc 。
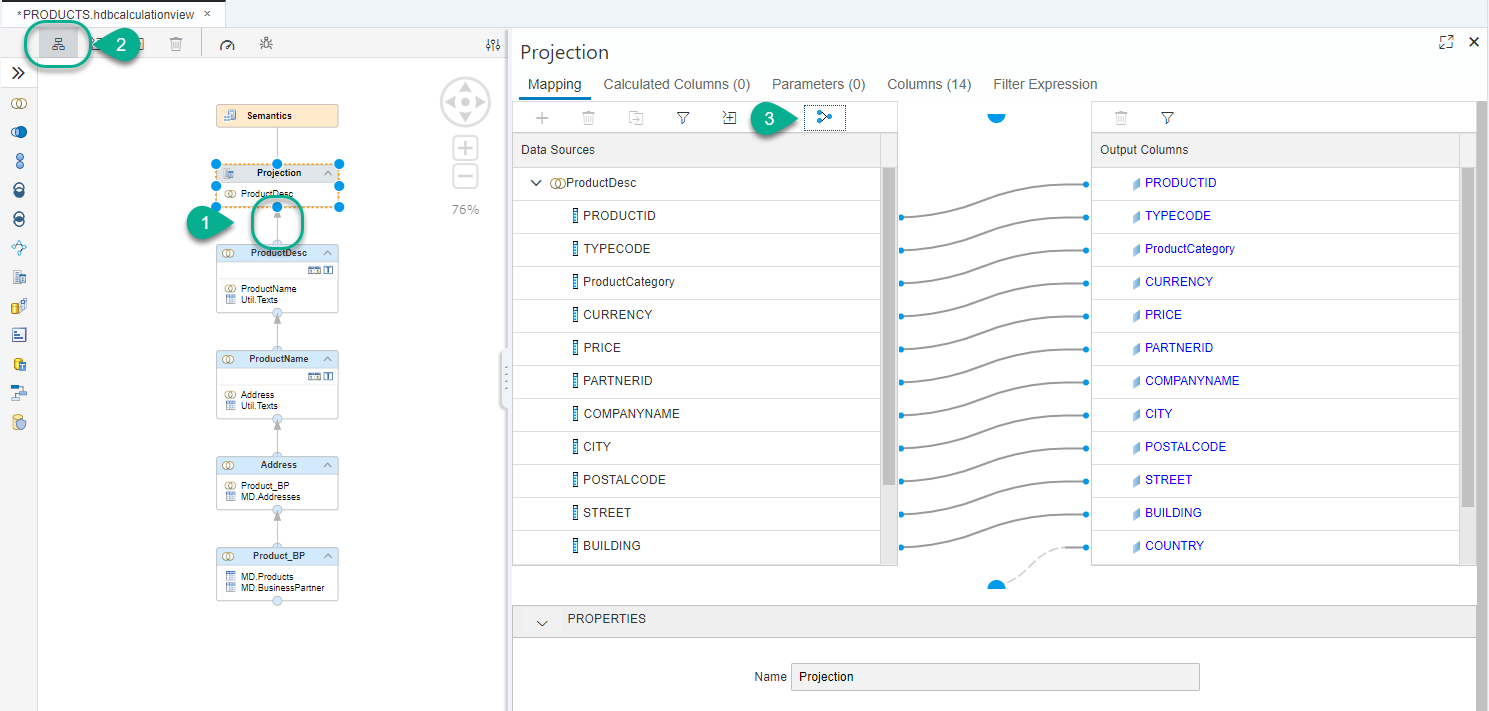
Step 7. Finalize the projection
Join 节点都添加完成后,我们该把这个 Calculation View 完成了,把最后添加的 ProductDesc 节点输入给 Projection 节点,点击 AutoLayout 可以自动对齐节点图形。再在 Projection 节点的详情里点击 Auto Map by name 把所有字段添加到输出列表。
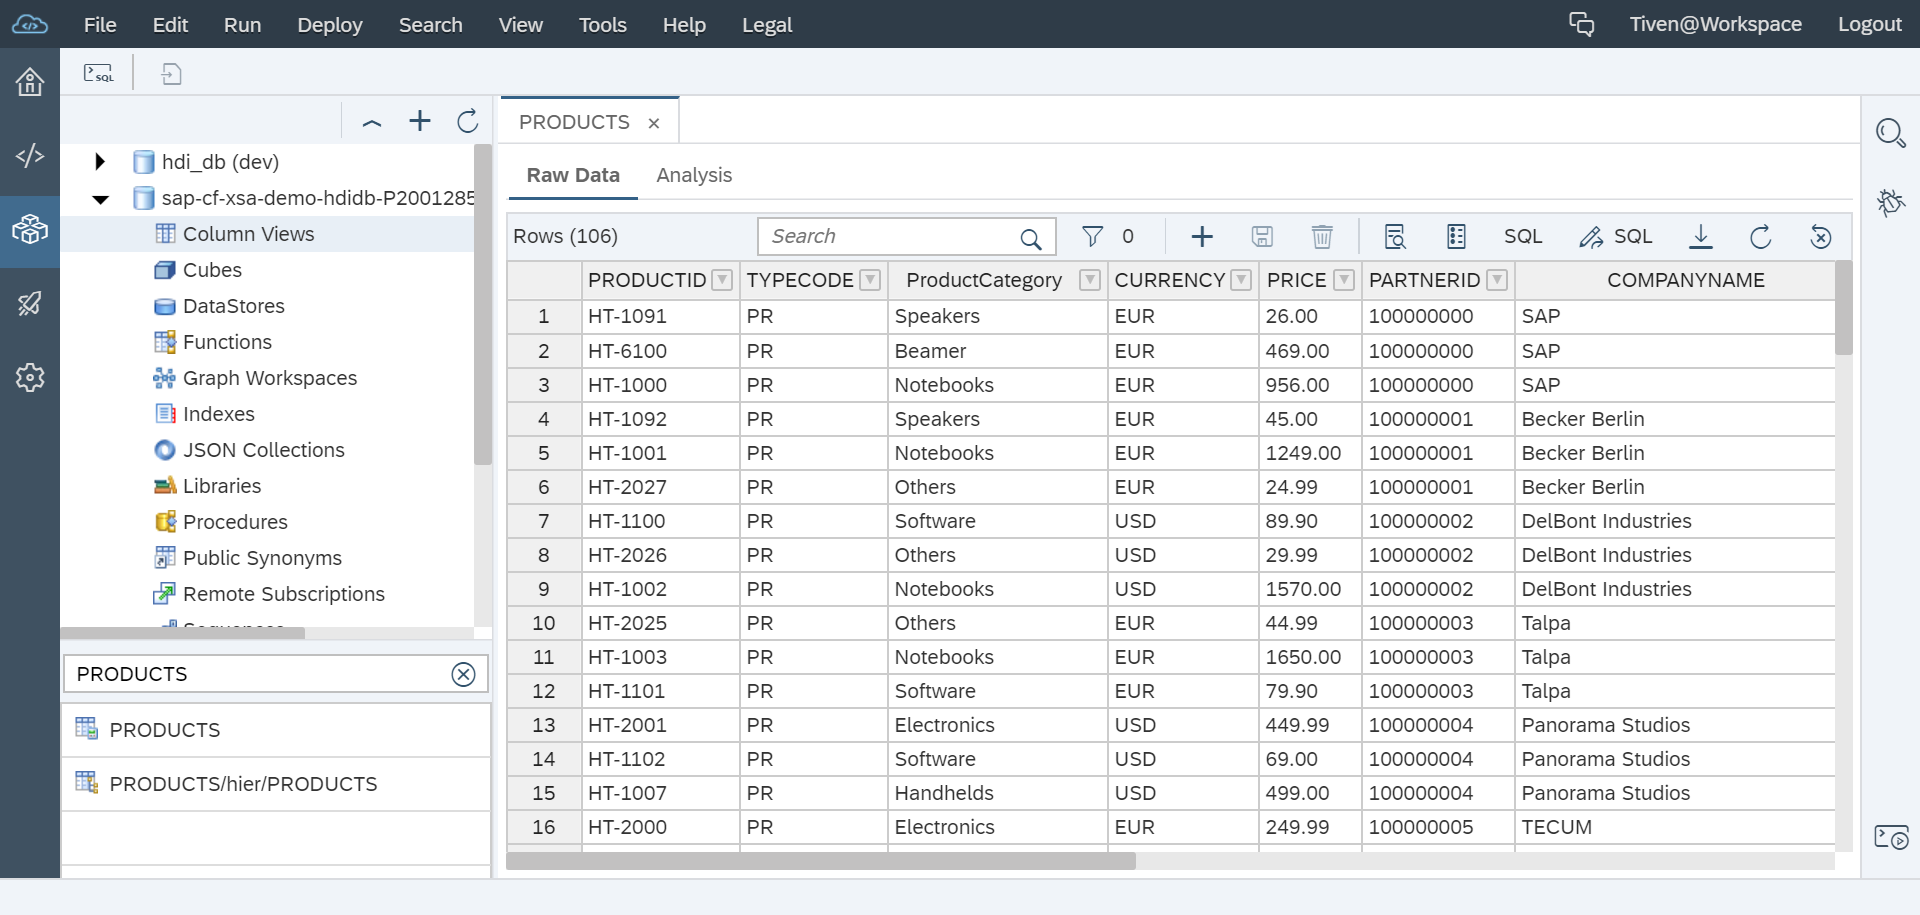
Build the view then right-click on it and choose Data Preview. The output should be similar to the following. 点击 SQL 按钮可以看到查询数据的 Select 语句。
Step 8. Commit Code
最后别忘了提交代码,养成良好的习惯。
Next Steps
SAP Cloud Foundry XSA - Create Cube Graphical Calculation View
Comments